Thank you for choosing the Katachi as your bed. This bed is inspired by Japandi Design for functionality and versatility.
It will add a chic, premium touch to your cozy corner. Correctly assembling the Katchi is necessary for the product to be as enjoyable as it was designed to be. Make sure to follow every step mentioned in this manual and don’t forget to recheck those nuts and screws.
Let's start building your bed...
Parts
Make sure you have all the parts shown below
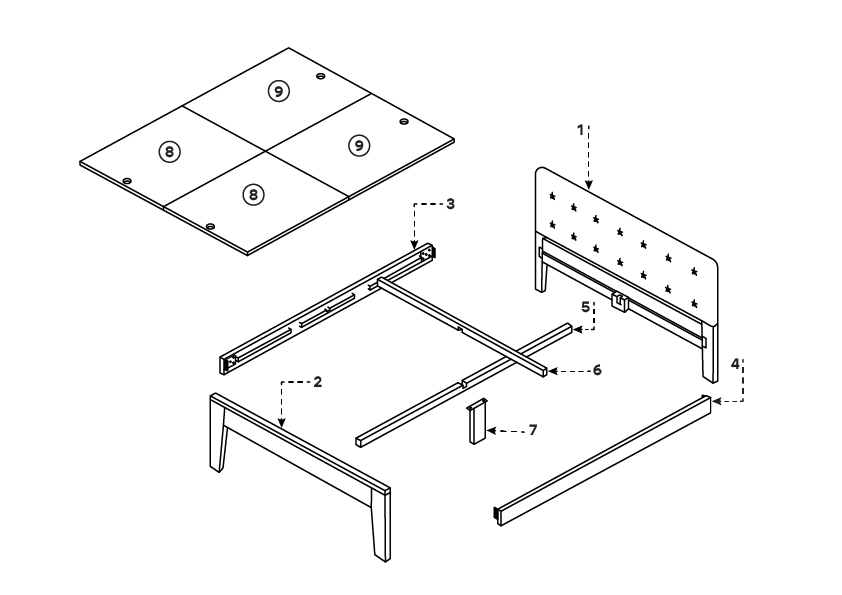
Parts Checklist
| 1. | Headboard-1 | Box 1 | ||
| 2. | FootBoard-1 | Box 1 | ||
| 3. | Side LHS Panel - 1 | BOX 2 | ||
| 4. | Side RHS Panel - 1 | BOX 2 | ||
| 5. | Vertical Panel - 1 | BOX 2 | ||
| 6. | Horizontal Panel - 2 | BOX 2 | ||
| 7. | Mid Leg - 2 | BOX 2 | ||
| 8. | Mattress Panel - 2 | BOX 3 | ||
| 9. | Mattress Panel - 2 | BOX 3 |
Hardware Checklist


Assembly Instructions
Step 1
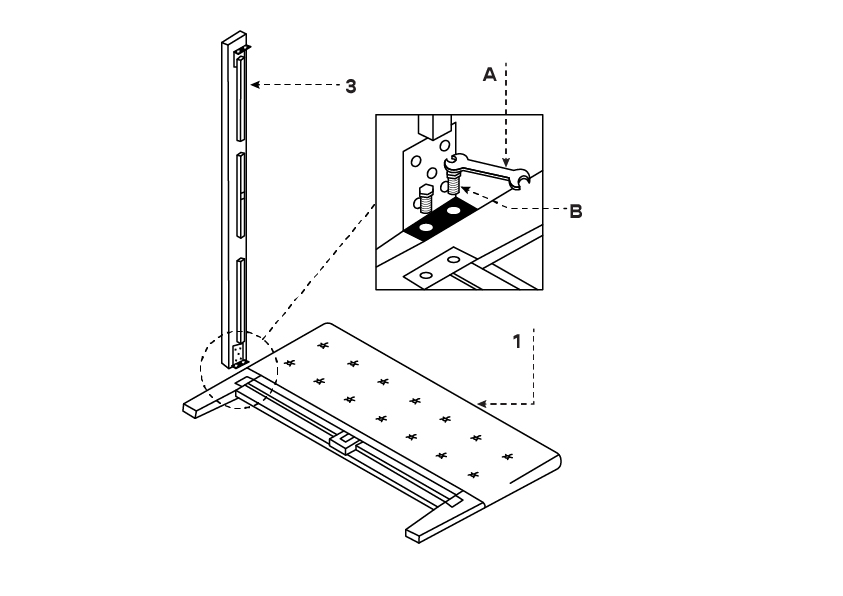
Join the LHS Panel (marked 3) with the Upholstered Headboard (marked 1) on the left side using 2 nuts and a spanner.
Step 2
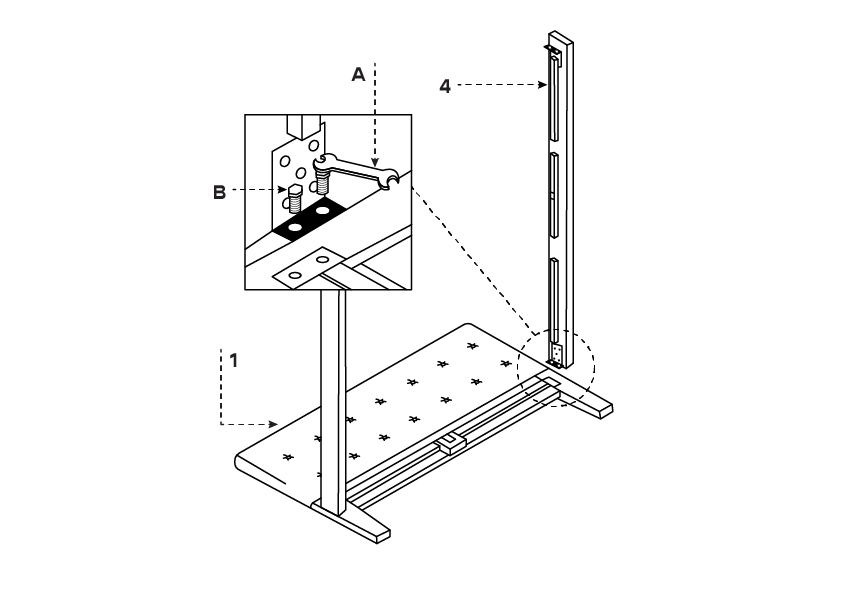
Then join the RHS Panel (marked 4) with the Upholstered Headboard (marked 1) on the right side using 2 nuts and a spanner.
Step 3
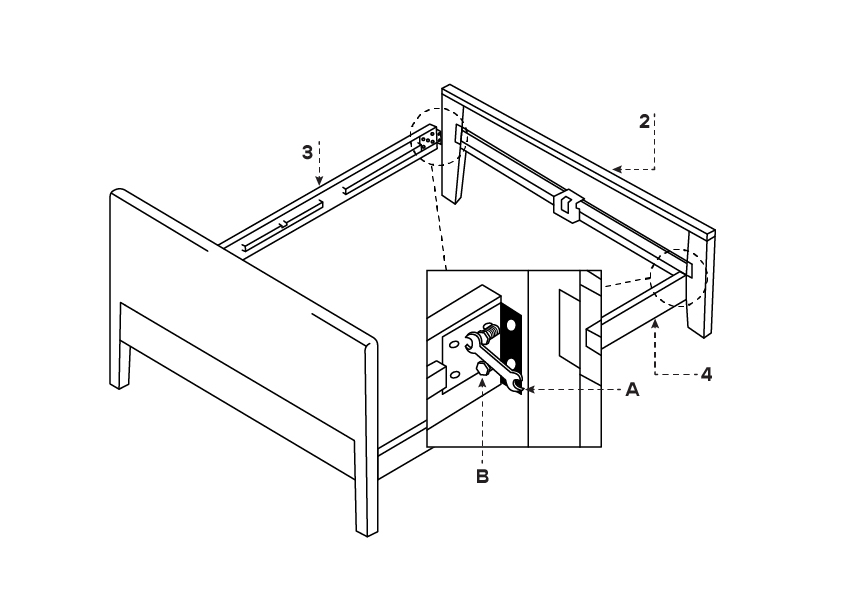
Join the Footboard (marked 2) with LHS Panel (marked 3) and RHS Panel (marked 4) with the help of a spanner and 2 nuts on the left and 2 nuts on the right side.The base or skeletal structure of your bed is ready Upholstered Headboard, Footboard, LHS Panel, and RHS Panel, keep that aside.
Step 4
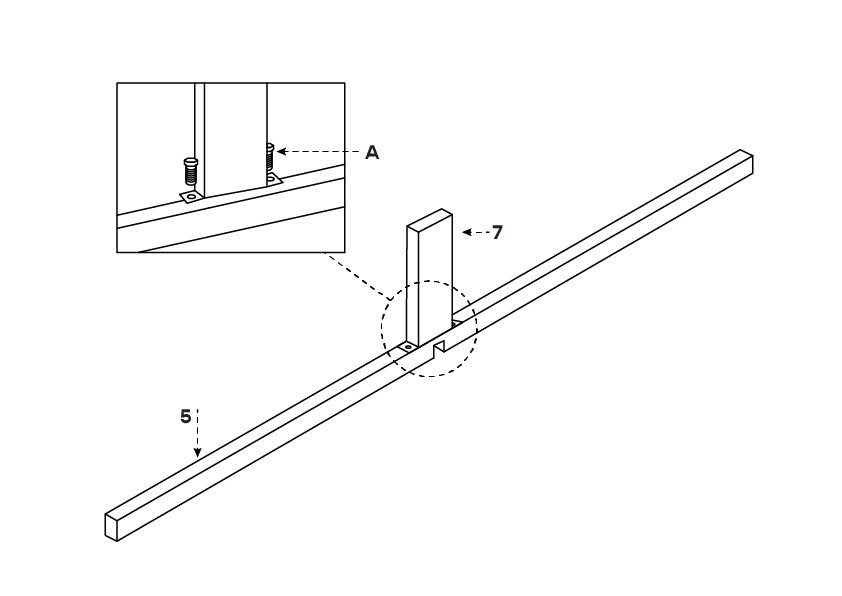
As shown in the respective image, join the Mid leg (marked 7) with the help of screws at the bottom side of the Vertical Panel (marked 5) for the support.
Step 5
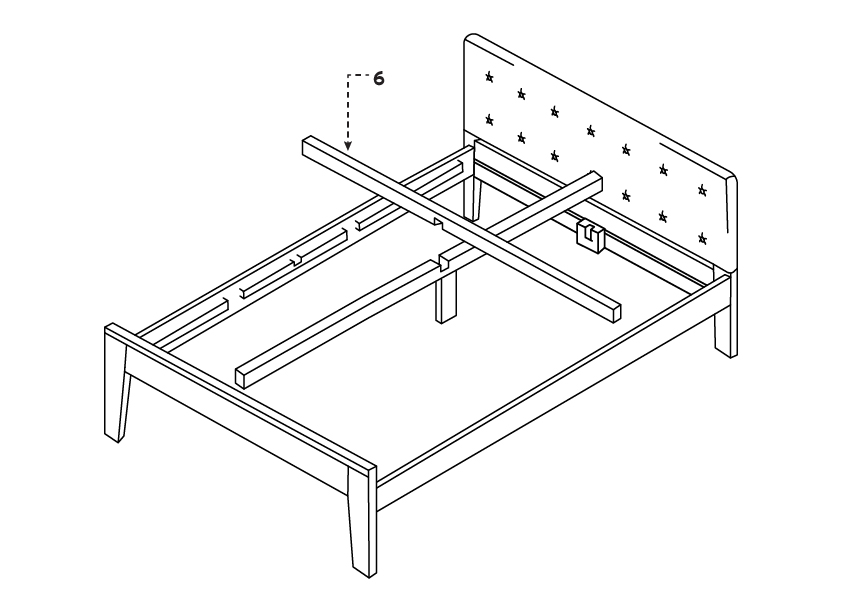
Put the Horizontal Panel (marked 6) on top of the base we made in Step 4 - with the Mid leg and the Vertical Panel. You will notice that this base is in a plus (+) sign. Join this base in the middle of the base you created in Step 3.
Step 6
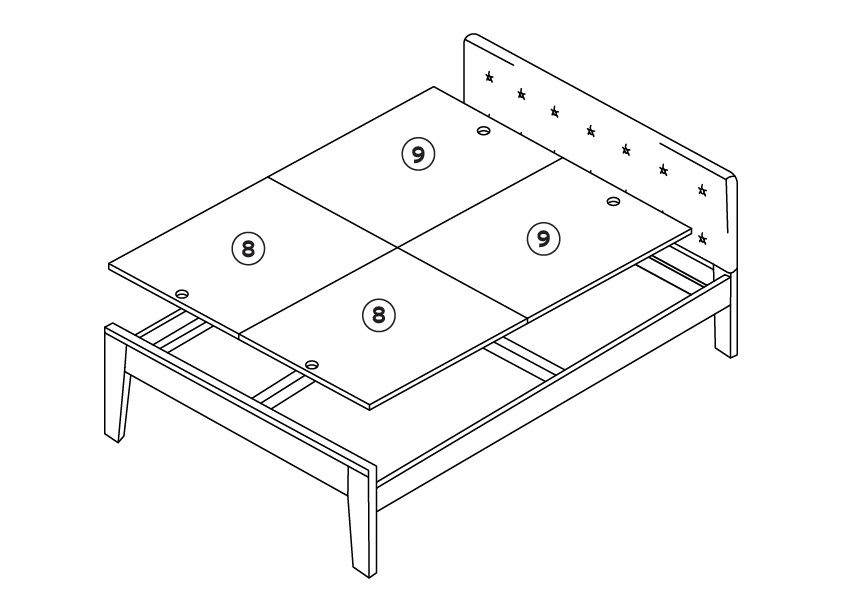
You have 4 square boards in Box 3 - these are your mattress panels. Place 2 Mattress Panels (marked 8) and 2 Mattress Panels (marked 9) on the top of the base of the bed.
Step 7
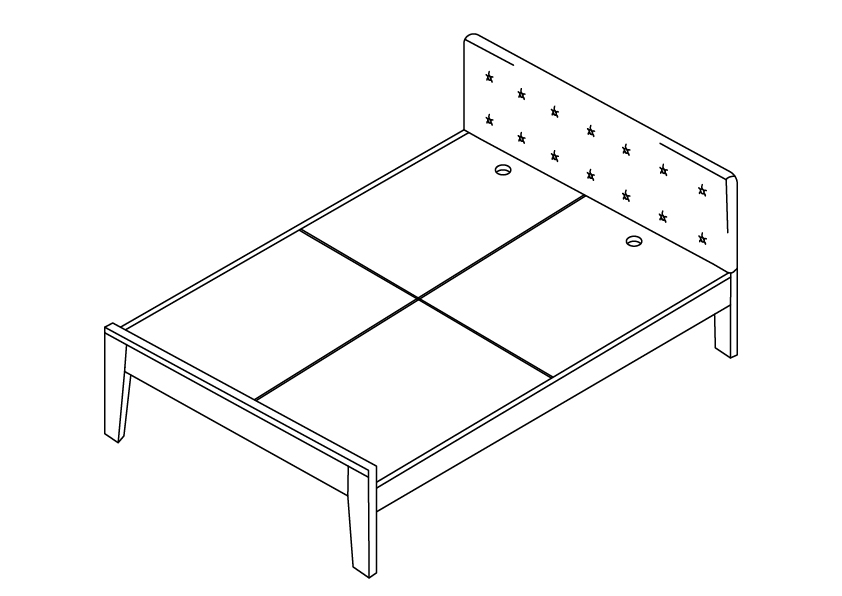
Your bed is ready for a mattress now. Go ahead and get some rest now, you’ve earned it.
